

Picture this. Someone spends six hours writing a blog post. They research the keyword, polish every paragraph, rewrite the headline four times. Then they grab a stock photo, drag the 5 MB file straight from their downloads folder into WordPress, leave the file name as IMG_4821.jpg, skip the alt text, and hit publish. The page takes forever to load on a phone, the image never shows up anywhere in Google Images, and nobody can figure out why the post is stuck on page three.
That’s not a rare story. It’s the default. Words get all the attention, and images get whatever time is left over, which is usually about thirty seconds.
Here’s the thing though. Images aren’t decoration anymore. They show up in Google Images, inside regular search results, in the Discover feed on millions of phones, in Google Lens when someone points their camera at a product, and inside AI Overviews. Every one of those is a way for someone to find your page. And on the flip side, a heavy, badly loaded image is often the single biggest reason a page feels slow.
So this guide walks through the whole thing from zero. How Google actually reads an image, which format to pick, how big a file should be, how to write alt text that isn’t garbage, how to stop images from wrecking your Core Web Vitals, and how to check whether any of it worked. If you’ve never thought about how to optimise images for SEO before, that’s fine. By the end you’ll be able to audit your own site and fix what’s broken.
Quick Answer
To optimise images for SEO, choose original and relevant images, save them in a modern format like WebP or AVIF, resize and compress them, use descriptive file names and alt text, place them near relevant text, add width and height, lazy load below-the-fold images, and submit them through an image sitemap.
What Is Image SEO?
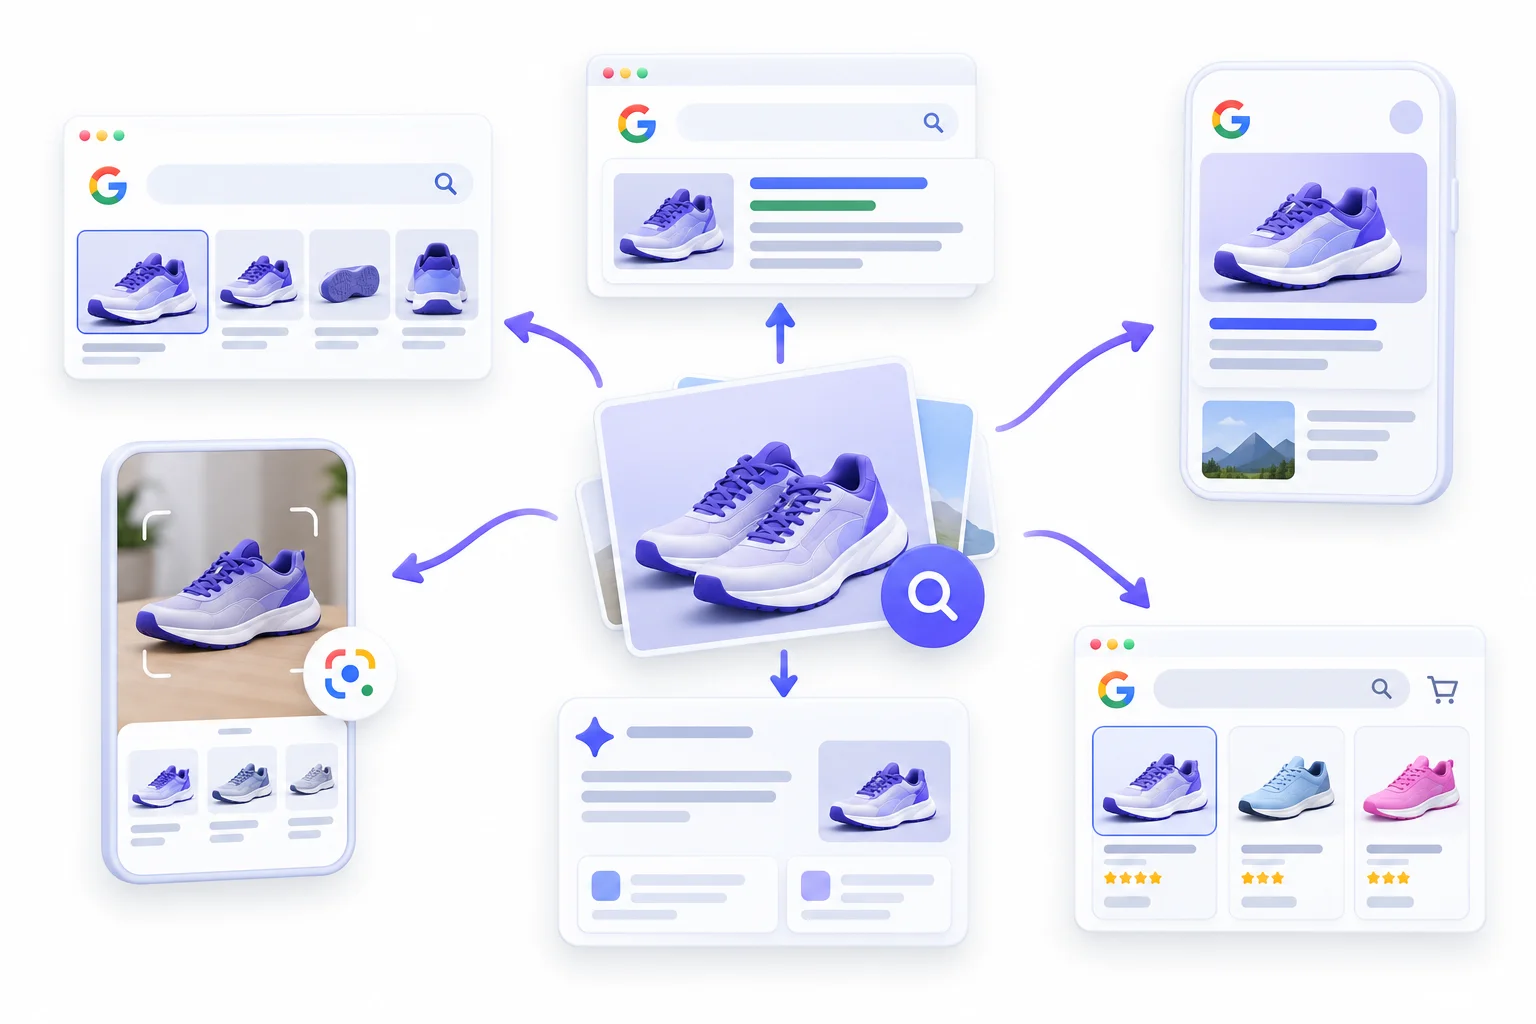
Image SEO is everything you do to an image so that search engines can find it, understand what it shows, and show it to the right people, without the image slowing down the page it sits on. That’s it. No mystery.
It covers two jobs at once. One job is about the file itself: format, size, compression, how it loads. The other job is about meaning: the file name, the alt text, the caption, the words around it, and any structured data that tells Google what the image is.
Most people only do one of those jobs. Developers obsess over file size and forget alt text. Content writers stuff keywords into alt text and upload a 4000-pixel photo. You need both.
Image SEO vs Image Optimisation: Is There a Difference?
Yeah, there’s a difference, and it trips up a lot of beginners because people use the two terms like they mean the same thing.
Image optimisation is mostly about performance. Making the file smaller, picking a lighter format, serving the right size to each device, loading it at the right time. A developer could fully “optimise” an image without ever thinking about search.
Image SEO includes all of that, plus the discoverability side. Can Google crawl the image? Does it know what the image shows? Is the image sitting on a page that’s relevant to what people search for?
- Image optimisation answers: how fast does this image load, and how much does it cost the page?
- Image SEO answers: that, plus can search engines find it, understand it, and rank it?
Think of optimisation as a subset. You can’t do good image SEO without it, but optimisation alone won’t get your images found.
Where Your Images Can Appear in Search
This is the part people underestimate. When someone says “image SEO” they usually picture the Google Images tab. That’s one place. There are several more, and each one rewards slightly different things.
| Surface | What it is | What helps you appear |
|---|---|---|
| Google Images | Dedicated image results tab | Alt text, page context, file names, sitemaps |
| Image packs in web results | Image rows inside regular results | Relevance to the query, page authority |
| Google Discover | Mobile content feed | Large, high-quality images (1200px+ wide), max-image-preview:large |
| Google Lens / visual search | Search by camera or image | Clear subjects, original photos, product schema |
| AI Overviews / AI Mode | AI-generated answers with visuals | Strong page context, descriptive alt text, captions |
| Google Shopping / product panels | Product listings | Product structured data, clean product shots |
Look at that list for a second. Discover alone can send serious traffic to a news site or blog, and it basically requires a large, good-looking image to even be eligible for the big card format. Lens is driven entirely by what’s in the picture. So the same image can win or lose in six different places depending on how you handle it.
Why Image SEO Matters More Than Ever
Honestly, image SEO used to be a “nice to have.” Something you’d get around to after the real SEO work was done. That framing doesn’t hold up anymore, and here’s why.
More Traffic From More Surfaces
Every surface in that table above is a separate door into your site. A product page with clean photos and Product schema can show up in regular results, Google Images, Shopping panels and Lens matches. That’s four chances instead of one, from the same page, with zero extra content written.
And visual search isn’t niche. Google has said publicly that Lens is used by more than 1.5 billion people a month, and that it handles close to 20 billion visual searches monthly, with around a fifth of those being shopping related. Those are Google’s own numbers. If you sell anything physical, that’s people literally pointing their phone at stuff they want to buy.
Faster Pages and Better Core Web Vitals
On most pages, the biggest thing that loads above the fold is an image. A hero banner, a featured image, a product photo. That image is very often the element Google measures for Largest Contentful Paint, one of the three Core Web Vitals.
So when the hero image is a bloated 3 MB JPEG, the whole page gets graded as slow. Fix the image and you often fix the metric. It’s one of the few SEO wins where a single change on a template can improve hundreds of pages at once.
Accessibility and Inclusive Design
People who use screen readers can’t see your images. The screen reader reads the alt text out loud instead. No alt text means they get either silence or the file name read out, which is how you end up with a screen reader saying “image, D-S-C, zero zero four seven, dot J-P-G.”
That’s a bad experience for a real person. And the same alt text that helps them is what search engines read too. Doing right by users and doing right by Google are the same task here.
Visual and AI Search Are Growing
AI Overviews and AI Mode pull visuals into their answers. Lens reads images directly. Systems like Gemini can describe what’s in a picture, read text inside it, and connect it to the page around it.
That means a clear, original, well-described image has more ways to get picked up than it did a few years ago. A blurry stock photo with no context has fewer.
Better Engagement and Conversions
Nobody buys a product they can’t see properly. Good product images, shown from multiple angles, loading fast on mobile, do more for an ecommerce page than another paragraph of description. Same goes for tutorials. A screenshot that shows exactly where to click saves people from bouncing back to the search results to find a clearer guide.
Beginner Note: Image SEO helps in two directions at once. It brings traffic from image surfaces, and it makes your regular pages faster, which supports rankings for the text content too.
How Search Engines Understand Images
Before getting into formats and alt text and all the practical stuff, it helps a lot to understand how Google actually figures out what an image is about. Once this clicks, every step later in this guide stops feeling like a random rule and starts making sense.
Short version: Google looks at the image itself, and it looks at everything around the image. Both matter. The stuff around the image probably matters more than most people think.
The Signals Google Reads
When Google finds an image on your page, it collects clues from several places:
- The page title and headings. A photo on a page titled “How to Repot a Monstera” is probably related to monsteras or repotting.
- The text around the image. The paragraph right before and after an image is strong context.
- The alt text. The most direct description you can give.
- The file name. A small hint, but a hint.
repotting-monstera-root-ball.jpgsays more thanIMG_7731.jpg. - Captions and image titles. Google’s own documentation says it pulls subject matter from the page content, including captions and image titles.
- Structured data. Markup that says “this image is the main photo of this product” or “this is the image for this recipe.”
None of these work alone. They stack. When the title, heading, nearby text, alt text and file name all point at the same subject, Google can be pretty confident about what the image shows.
Computer Vision and OCR: Google Reads the Pixels Too
Google doesn’t just read the words around an image anymore. It analyses the pixels. Computer vision models can recognise objects, scenes, landmarks, products and faces. OCR (optical character recognition) reads text that appears inside an image, like the words on a chart, a product label or a screenshot.
That’s how Lens works. You point your camera at a pair of shoes and Lens finds similar shoes without anyone typing anything.
So what does that mean in practice? It means image quality and clarity now affect understanding, not just looks. A dark, cluttered photo where the product is tiny in the corner is harder for a model to interpret than a clean, well-lit shot with the subject front and centre.
Why the Page Matters as Much as the Image
This is the part most image SEO advice skips. You can have perfect alt text and a perfectly compressed file, and the image still won’t rank if it sits on a thin, irrelevant page.
Google is ranking a page-image pair, not just an image. When someone clicks an image result, they land on your page. If the page doesn’t match what they were looking for, that’s a bad result, and Google knows it.
| Signal | What it tells Google | How much control you have |
|---|---|---|
| Page content and headings | Overall topic and context | Full |
| Alt text | What the image shows | Full |
| File name | Basic subject hint | Full |
| Caption and nearby text | Context and relevance | Full |
| Structured data | Image type and relationships (product, recipe, article) | Full |
| Image content (computer vision) | Objects, scenes, text in image | Partial (through image quality and clarity) |
| Page quality and authority | Trustworthiness of the source | Indirect |
Notice how much of that table says “Full.” That’s good news. Most of what decides how your images perform is completely in your hands.
Choosing the Right Images Before You Upload
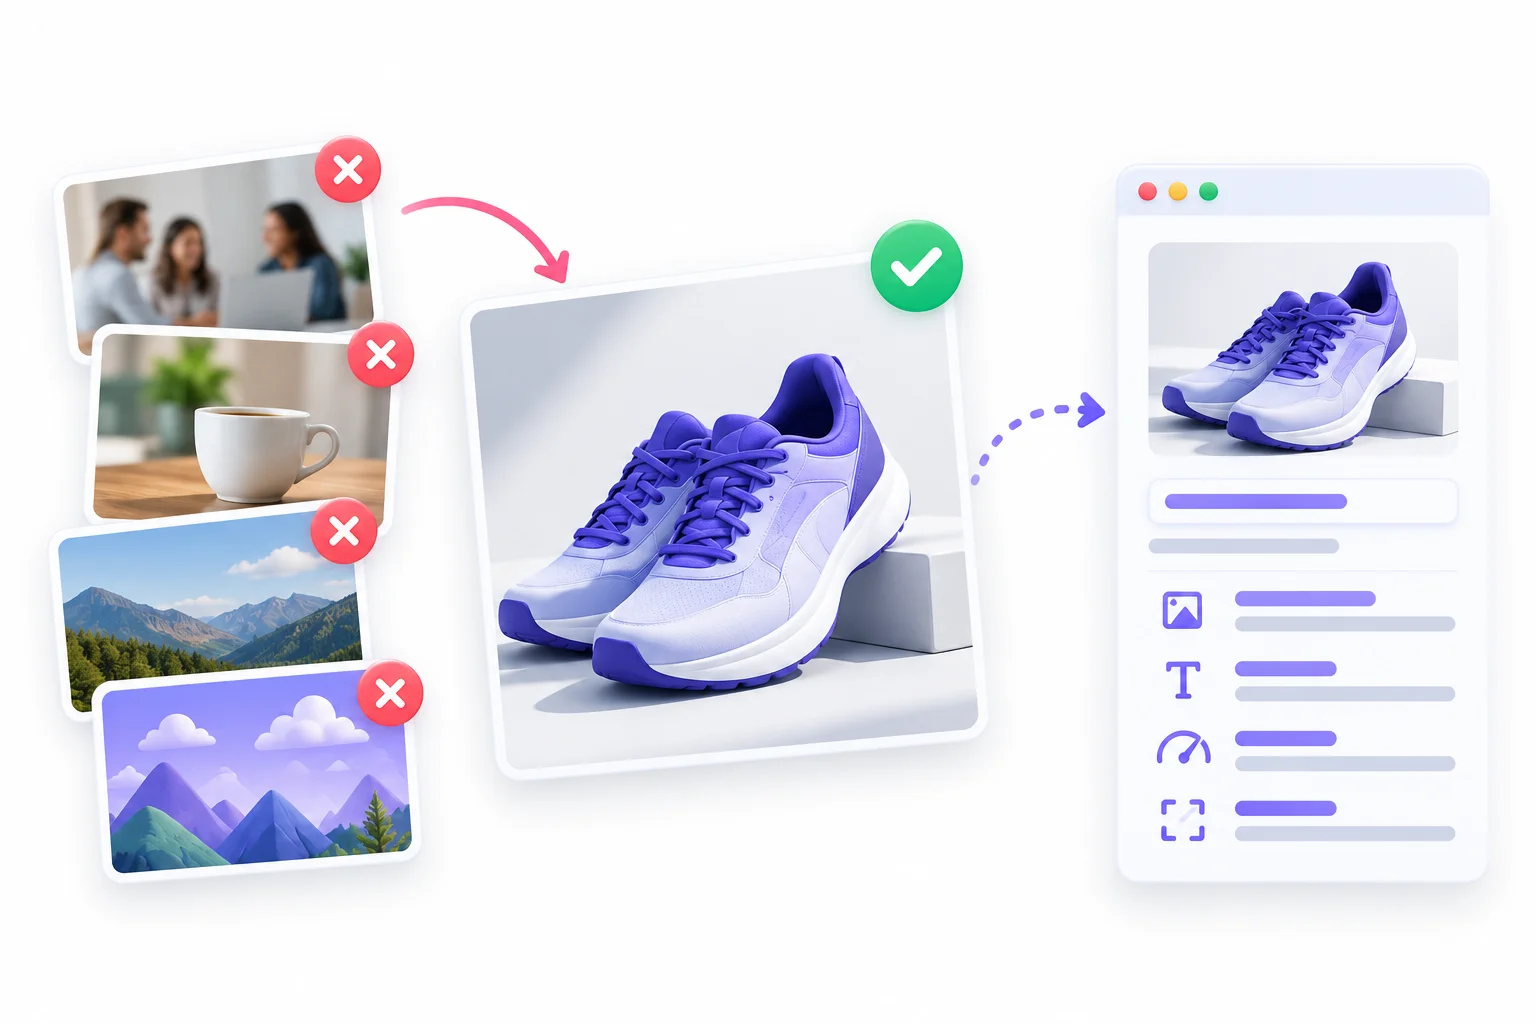
Image SEO starts way before you open the media library. It starts the moment you decide which image goes on the page. Get this wrong and no amount of compression or alt text will save it.
The basic question for every image: does this help the reader understand something, or is it just filling space?
Original Images vs Stock Photos
Stock photos are everywhere because they’re easy. That’s exactly the problem. The same “diverse team smiling at a laptop” photo appears on thousands of websites. It tells Google nothing unique about your page, and it tells readers even less.
Original images are different. Your own product photos, your own screenshots, a chart you made from your own data, a photo of your actual office or project. Nobody else has them. They make the page more trustworthy, and for visual search they give Lens something distinct to match.
That doesn’t mean stock is banned. Sometimes you need a generic image for a header and that’s fine. Just don’t expect it to do any SEO work for you.
Relevance: Every Image Should Earn Its Place
A lot of blogs follow some rule like “one image every 300 words.” So writers drop in whatever loosely related photo they can find just to break up the text. A photo of a coffee cup in an article about email marketing. A handshake in a post about tax deadlines.
Nope. Every image should show something connected to the text around it. If you’re explaining how to set up a Google Analytics property, show the actual setup screen. If you’re explaining a process, draw the process. Irrelevant images confuse search engines about the topic and they annoy readers.
Image Quality, Clarity and Lighting
Since Google analyses the pixels, quality matters for more than looks. A few practical rules:
- Make the subject obvious. One clear main subject beats a busy scene.
- Light it properly. Dark, grainy photos are harder for both humans and models to read.
- Keep it sharp. Blurry screenshots with unreadable text are useless to everyone.
- Crop with intent. Cut out the empty space and the distractions.
You don’t need a professional camera. A modern phone, decent daylight and a plain background will get a product photo most of the way there.
Text Inside Images: When It Helps and When It Hurts
Text inside images is tricky. On one hand, OCR can read it, so a clearly labelled chart or diagram gives Google more to understand. On the other hand, text inside an image is invisible to screen readers unless you describe it, it doesn’t scale well on small screens, and it can’t be selected or translated.
The rule is simple. Labels and annotations inside an image are fine and often helpful. But never put important information only inside an image. If your pricing table, your key steps or your main argument exist only as a picture, put that information in the HTML text too.
Also, Google’s own guidance for preferred page images (more on that later) says to avoid images with text when picking the main image for schema or og:image. Text-heavy images make poor thumbnails anyway. They get unreadable when shrunk.
AI-Generated Images and Disclosure
AI image tools are everywhere now, and plenty of blogs use them for illustrations. Google doesn’t ban AI-generated images from search. What matters is the same thing that matters for any image: is it relevant, is it helpful, does it accurately show what the page is about?
Where it gets serious is accuracy. An AI image of a “product” that doesn’t exist, or a fake photo pretending to be a real place or event, misleads people. That’s where trust breaks.
Google also supports IPTC metadata, which can include a field marking an image as created by a generative AI tool. Google uses that kind of metadata in features like “About this image.” And for product images in Google Merchant Center, AI-generated images need to carry that metadata. Many AI image tools now add it automatically. If yours doesn’t, and you’re using the image in a context where people might assume it’s a real photo, label it.
Licensing, Copyright and Image Rights
Grabbing an image from Google Images and dropping it on your site is not “free to use.” Most images online are copyrighted. Using one without permission can get you a takedown notice or a bill.
Safe options:
- Your own photos and graphics
- Paid stock with a proper licence
- Free stock libraries with clear licences (read the terms anyway)
- Images with Creative Commons licences that allow your use, with attribution if required
| Image type | SEO value | Best use | Watch out for |
|---|---|---|---|
| Original photos | High | Products, case studies, teams, locations | Lighting, file size |
| Custom graphics / infographics | High | Explainers, data, processes | Text readability, mobile sizing |
| Screenshots | Medium to high | Tutorials, software guides | Blurry text, huge PNG files |
| Stock photos | Low | Filler, mood | Duplicated across thousands of sites |
| AI-generated images | Varies | Illustrations, concepts | Disclosure, accuracy, uncanny details |
Pro Tip: If a stock photo could sit on any competitor’s page without anyone noticing, it adds almost nothing to your SEO. One annotated screenshot usually beats three stock images.
Image File Formats Explained
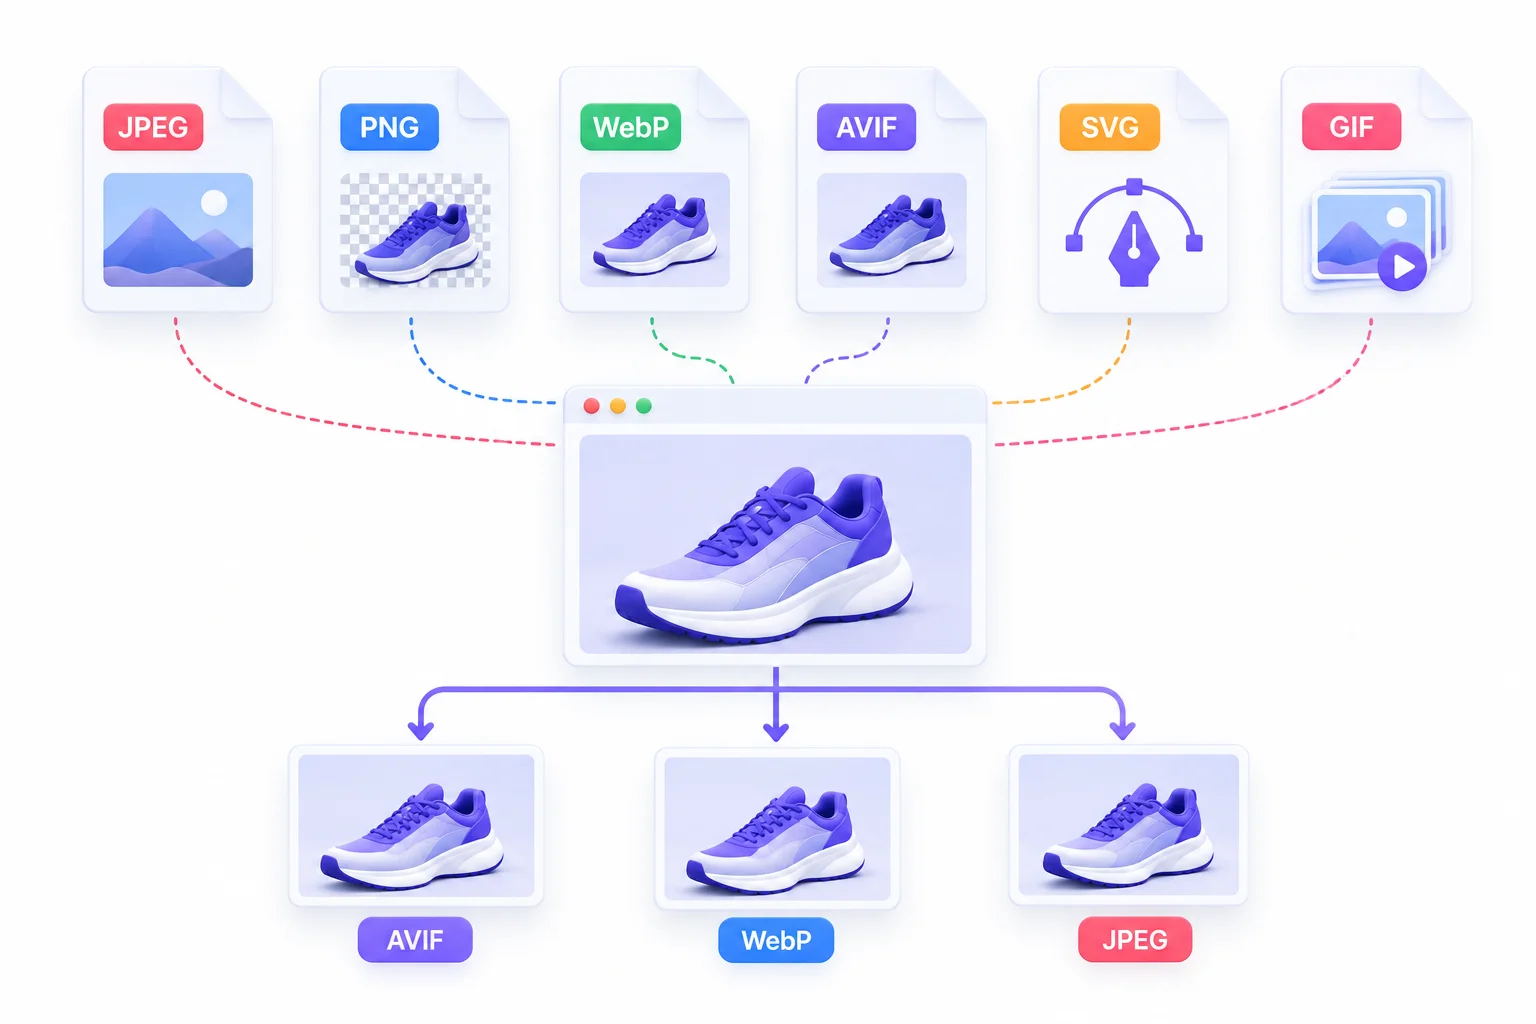
This is where most beginners get stuck. JPEG, PNG, WebP, AVIF, SVG, GIF. Six formats, all of them still around, all of them with fans online saying theirs is best.
Good news: once you understand what each one is for, the choice gets pretty obvious. Each format is basically a different trade-off between file size, quality and features like transparency or animation.
JPEG
JPEG (or JPG, same thing) has been the standard for photos since the 90s. It uses lossy compression, which means it throws away some image data to make the file smaller. With photos, you usually can’t see the difference at sensible quality settings.
Every browser, every device, every app supports it. That’s its big strength. Its weakness is that newer formats produce smaller files at the same visual quality, and JPEG doesn’t support transparency.
PNG
PNG uses lossless compression, so nothing is thrown away. It supports transparency, which is why logos and graphics with see-through backgrounds often use it.
The catch is size. A photo saved as PNG can be several times bigger than the same photo as JPEG. People do this all the time by accident, especially with screenshots, and it’s one of the most common reasons pages are slow. PNG makes sense for sharp graphics, screenshots with lots of text, and anything needing transparency. Not for photos.
WebP
WebP was created by Google and it’s the practical default for the modern web. It supports both lossy and lossless compression, transparency and animation. Files are generally noticeably smaller than equivalent JPEGs and PNGs.
Every modern browser supports it now, including Safari since version 14. WordPress has supported WebP uploads since version 5.8. If you only remember one format from this section, remember WebP.
AVIF
AVIF is newer and compresses even better than WebP, especially for photos. At the same visual quality, AVIF files are often the smallest of the bunch.
Support is good across current versions of Chrome, Firefox, Edge and Safari, but older devices and browsers may not handle it. So AVIF works best with a fallback (covered in a minute). WordPress added AVIF upload support in version 6.5. Encoding AVIF can also be slower, which matters if you’re converting thousands of images.
SVG
SVG is different from everything else here. It’s not made of pixels. It’s a vector format, which means the image is drawn with code: shapes, lines, curves. That’s why an SVG logo looks razor sharp on a phone and on a 4K monitor at the same file size.
Use SVG for logos, icons and simple illustrations. Don’t try to use it for photos. That’s not what it’s for.
One warning: SVG files can contain code, so be careful uploading SVGs from sources you don’t trust. That’s why WordPress doesn’t allow SVG uploads by default.
GIF and Animated Alternatives
GIF is old, limited to 256 colours, and animated GIFs are often enormous. A five-second animated GIF can easily weigh more than the rest of the page combined.
For animation, a short MP4 or WebM video set to autoplay, loop and mute looks the same to the user and is usually far smaller. Lighthouse even flags large GIFs and suggests switching to video. Animated WebP is another option.
Which Formats Google Supports
Google Search supports images in BMP, GIF, JPEG, PNG, WebP, SVG and AVIF. So every format in this section can be indexed. The question isn’t “will Google see it,” it’s “which one gives the best quality for the smallest file.”
Serving Modern Formats With Fallbacks
So what if you want to use AVIF but worry about older browsers? That’s what the <picture> element is for. You list formats in order of preference, and each browser picks the first one it supports.
<picture>
  <source srcset="red-office-chair.avif" type="image/avif">
  <source srcset="red-office-chair.webp" type="image/webp">
  <img src="red-office-chair.jpg"
       alt="Red leather office chair with chrome base"
       width="1200" height="800">
</picture>
A browser that supports AVIF gets the AVIF. One that only supports WebP gets WebP. Anything older gets the JPEG. The <img> tag at the bottom is the fallback, and it’s also where the alt text, width and height live.
Google parses the <img> element inside <picture>, so this setup is fine for indexing.
| Format | Compression | Transparency | Animation | Best for | Browser support |
|---|---|---|---|---|---|
| JPEG | Lossy | No | No | Photos | Universal |
| PNG | Lossless | Yes | No | Graphics, screenshots needing transparency | Universal |
| WebP | Lossy + lossless | Yes | Yes | Almost everything (default choice) | All modern browsers |
| AVIF | Lossy + lossless | Yes | Yes | Photos where size matters most | Modern browsers (use fallback) |
| SVG | Vector | Yes | Yes (CSS/JS) | Logos, icons, simple illustrations | Universal |
| GIF | Lossless (256 colours) | Yes | Yes | Avoid; use video instead | Universal |
Quick Win: Not sure which format to choose? Use WebP for almost everything, SVG for logos and icons, and AVIF with a fallback only if your platform or CDN handles it automatically.
Image Dimensions and Resizing
Dimensions are the width and height of an image in pixels. And there are two kinds you need to keep apart in your head: the size of the file, and the size it’s actually displayed at on the page.
Here’s a really common example. Someone takes a photo on their phone. It’s 4000 pixels wide. They upload it into a blog post where the content column is 800 pixels wide. The browser downloads all 4000 pixels, then shrinks it down to 800 to display it. Most of that download was wasted.
Why Uploading Huge Images Slows Your Site
Every extra pixel is extra data. A 4000-pixel image has 25 times as many pixels as an 800-pixel one at the same aspect ratio. Even after compression, that’s a far bigger file.
On a fast office connection, maybe nobody notices. On a mid-range phone on a patchy mobile connection, that image is the reason the page feels broken. And since that’s how a big chunk of people browse, it’s the experience that counts.
Some platforms, like WordPress, automatically create smaller versions of uploaded images. That helps, but it doesn’t fix everything. WordPress also keeps a scaled version of very large uploads, and themes don’t always pick the right size. Resizing before upload is still the cleanest habit.
How to Find the Right Display Size
So how do you know what size an image is actually displayed at? Easy way:
- Open the page in Chrome.
- Right-click the image and choose “Inspect.”
- Hover over the
<img>tag in the panel that opens. - Chrome shows two numbers: the rendered size (how big it appears) and the intrinsic size (the actual file dimensions).
If the rendered size is 800 × 450 and the intrinsic size is 4000 × 2250, you know exactly what to fix. Do this once for your main templates (blog post, product page, homepage) and you’ll know your target sizes for good.
Retina and High-Density Screens: The 2x Rule
Now the catch. Modern phones and many laptops have high-density screens, where one “CSS pixel” is made of two or three physical pixels. An 800-pixel image on those screens can look a little soft.
The common practice is to provide images at roughly 2x the display size for sharpness. So for an 800-pixel slot, a 1600-pixel image. Going beyond 2x usually adds file weight without a visible improvement for most people.
Better yet, give the browser multiple sizes and let it choose. That’s what responsive images do, and there’s a full section on that further down.
Aspect Ratios and Consistent Layouts
Aspect ratio is the shape of the image: width compared to height. 16:9 is wide like a TV, 1:1 is square, 4:3 is a bit squarer than widescreen.
Keeping ratios consistent across a site matters more than it sounds. Product grids with mixed ratios look messy. Blog cards with random shapes jump around. And when the browser doesn’t know an image’s ratio ahead of time, the layout shifts as images load, which hurts your Cumulative Layout Shift score.
Pick a ratio for each image type (featured images, product images, thumbnails) and stick to it.
Size Requirements for Discover and Social Sharing
Two places have specific needs:
- Google Discover. Google says to use large, high-quality images at least 1200 pixels wide, and to allow large previews using the
max-image-preview:largerobots setting (or by using AMP). Without that, you’re stuck with small thumbnails, which get far less attention in the feed. - Social sharing (Open Graph). When someone shares your link on Facebook, LinkedIn or WhatsApp, the preview image comes from your
og:imagetag. Facebook recommends 1200 × 630 pixels, and that size works well across most platforms.
Here’s the meta tag that unlocks large Discover previews, if your SEO plugin doesn’t already add it:
<meta name="robots" content="max-image-preview:large">
| Use case | Recommended width | Aspect ratio | Notes |
|---|---|---|---|
| Blog featured image | 1200 to 1600px | 16:9 | Also works for Discover and og:image |
| In-content blog image | 800 to 1200px | Flexible | Match container width at 2x where needed |
| Product main image | 1000 to 2000px | 1:1 | Allows zoom; compress well |
| Open Graph (social share) | 1200 x 630px | 1.91:1 | Avoid text-heavy or logo-only images |
| Thumbnails | 300 to 400px | Match grid | Use separate small versions, not scaled-down originals |
| Logos / icons | SVG | n/a | Scales without quality loss |
Treat these as practical starting points, not laws. The only hard requirement in that table that comes straight from Google is the 1200-pixel minimum width for Discover. Everything else depends on your theme and layout, so check your actual display sizes using the Inspect trick above.
Image Compression: Smaller Files Without Visible Quality Loss
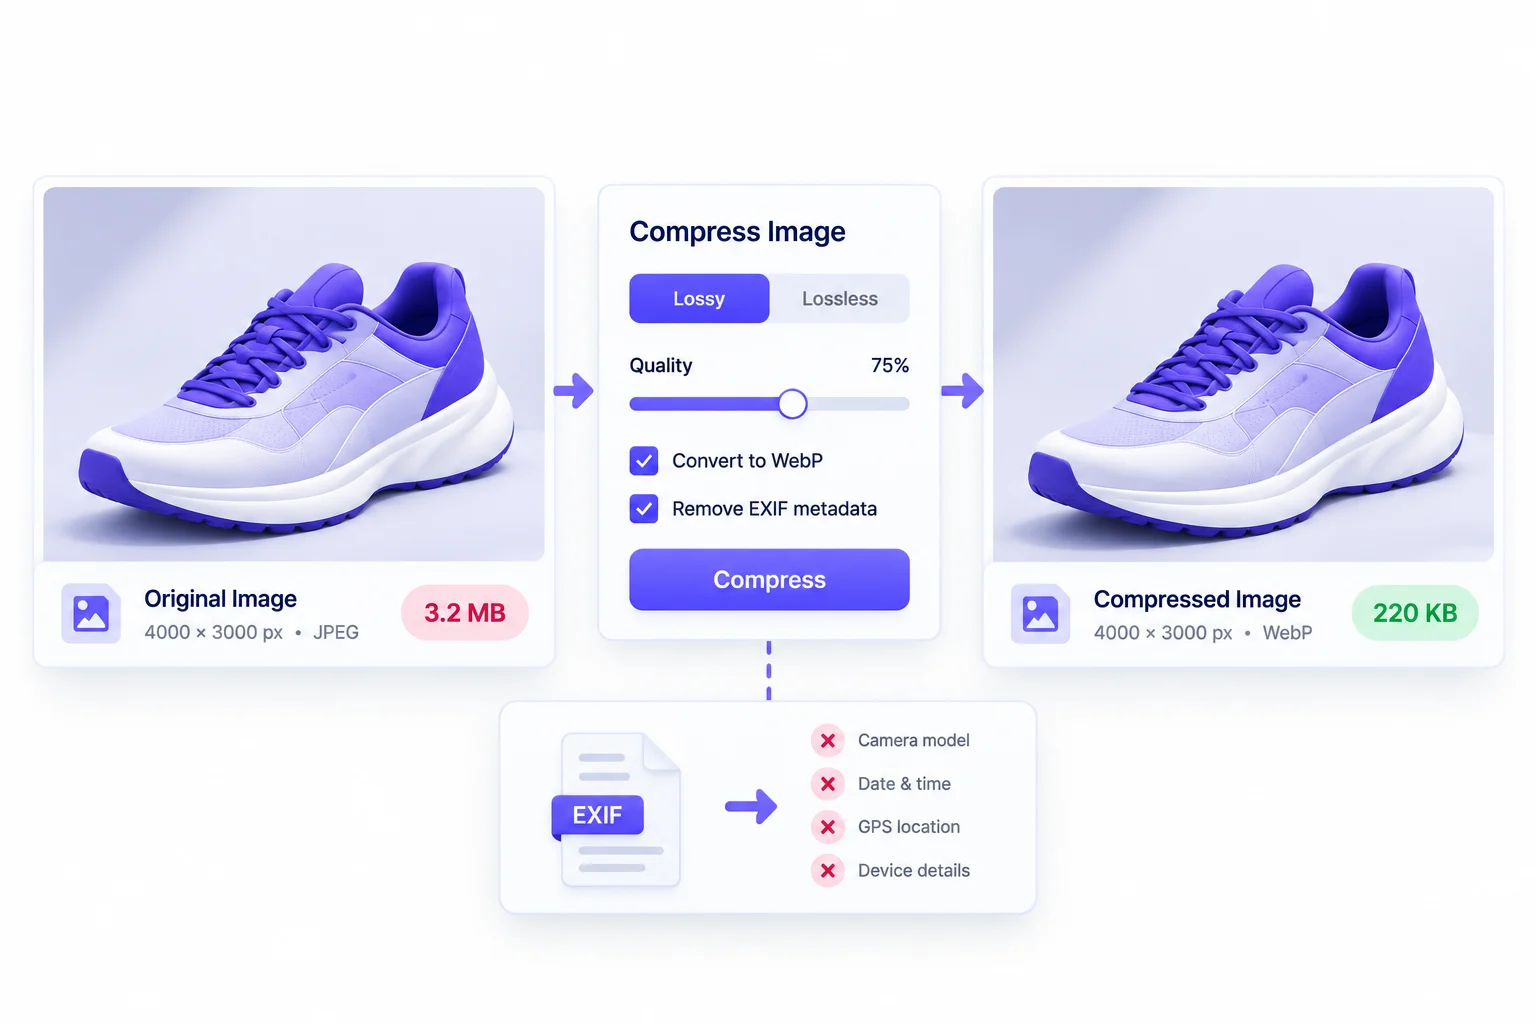
Resizing gets the pixel count right. Compression shrinks the file further by storing that data more efficiently. You need both. A correctly sized image that isn’t compressed is still heavier than it should be.
Lossy vs Lossless Compression
There are two kinds, and the difference is simple.
Lossy compression throws away some image data that the human eye is bad at noticing, like tiny variations in colour. Files get much smaller. Push it too far and you start seeing blocky patches and smudgy edges.
Lossless compression doesn’t throw anything away. It just finds smarter ways to store the same data, a bit like zipping a file. The image is identical to the original, but the savings are smaller.
| Lossy | Lossless | |
|---|---|---|
| How it works | Removes data the eye rarely notices | Reorganises data, removes nothing visible |
| File size reduction | Large | Moderate |
| Quality | Slight loss (usually invisible at good settings) | Identical |
| Best for | Photos | Logos, screenshots, graphics with text |
For photos, lossy is almost always the right call. For screenshots full of small text, or logos with hard edges, lossless keeps things crisp.
Finding the Right Quality Setting
Most tools give you a quality slider from 0 to 100. There’s no magic number that works for every image, because a photo of a clear blue sky compresses very differently from a photo of a gravel path.
A practical way to work: start somewhere around 75 to 85 for photos, then compare the compressed version against the original at 100% zoom. If you can’t tell them apart, try going lower. The moment you start noticing artefacts, step back up a notch.
Squoosh (a free tool made by Google’s Chrome team) is great for this because it shows a side-by-side slider with the live file size. Spend ten minutes playing with it and you’ll develop an eye for it fast.
Stripping Metadata (EXIF) to Save Space
Photos from cameras and phones carry hidden data called EXIF: camera model, settings, date, sometimes even GPS location. It adds weight to the file, and the GPS part can be a privacy problem. Imagine posting a photo taken at home that quietly includes your home coordinates.
Most compression tools strip EXIF by default. That’s usually what you want.
The exception is copyright and licensing information stored as IPTC metadata. If you’re a photographer or you license images, you may want to keep creator, copyright and licence fields, because Google can use that data in Google Images. Good tools let you strip the junk and keep the rights info.
Bulk Compression for Existing Sites
If your site already has hundreds or thousands of uncompressed images, nobody’s going to fix them one by one. Bulk options:
- WordPress plugins like ShortPixel, Imagify or EWWW Image Optimizer can compress your whole media library and convert to WebP.
- Image CDNs like Cloudinary, Cloudflare Images or ImageKit compress and convert images automatically as they’re served.
- Command line tools like ImageMagick or cwebp work well for developers handling big batches.
Always back up originals before running anything in bulk. If a setting turns out too aggressive, you want a way back.
Practical File Size Targets
People love asking “how many KB should an image be?” There’s no official number from Google. It depends on dimensions, content and format.
A sensible working approach: keep in-content blog images as light as possible without visible quality loss, and pay extra attention to the hero image, since it affects LCP. Screaming Frog flags images over 100 KB by default, which is a useful line for spotting the worst offenders. It’s not a rule, just a good place to start looking.
Common Mistake: Compressing the same JPEG again and again. Every save adds quality loss. Always compress from the original, high-quality file.
How to Name Image Files for Search
The file name is one of the smallest signals in image SEO, but it’s also one of the easiest to get right. It takes five seconds per image. There’s no excuse to skip it.
Google’s documentation says file names can give it clues about the image’s subject. So IMG_4821.jpg gives zero clues and red-leather-office-chair.jpg gives a good one.
Rules for SEO-Friendly File Names
- Describe what’s in the image. Not what the page is about in general. What’s actually in the picture.
- Use hyphens between words.
office-chair.jpg, notoffice_chair.jpgorofficechair.jpg. Google recommends hyphens in URLs, and image file names end up in URLs. - Use lowercase. Some servers treat
Chair.jpgandchair.jpgas two different files, which gets messy. - Keep it short. Three to six words is usually plenty.
- No keyword stuffing.
seo-tips-best-seo-seo-guide.jpglooks spammy and helps nobody. - No spaces or special characters. Spaces turn into
%20in URLs, which is ugly and occasionally breaks things.
| Bad | Good | Why |
|---|---|---|
| IMG_4821.jpg | red-leather-office-chair.jpg | Describes the subject |
| image1-final-v2.png | google-search-console-image-report.png | Specific and readable |
| best_seo_seo_tips_seo.jpg | on-page-seo-checklist.jpg | No keyword stuffing |
| Screenshot 2026-10-14 at 4.32.png | wordpress-media-library-alt-text-field.png | No spaces or dates |
Renaming Images Already on Your Site
Should you go back and rename every old image? Honestly, probably not.
Renaming an image file changes its URL. If Google has already indexed the old URL, or other sites link to it, renaming breaks those references unless you set up redirects. For a small file-name benefit, that’s a lot of risk and effort.
A better approach: name every new image properly from today onward. Only rename old images if they’re on a few high-value pages and you can set up 301 redirects from the old image URLs to the new ones. Some WordPress plugins handle renaming and redirects together, but test on a staging site first.
Writing Alt Text That Helps Users and Search Engines
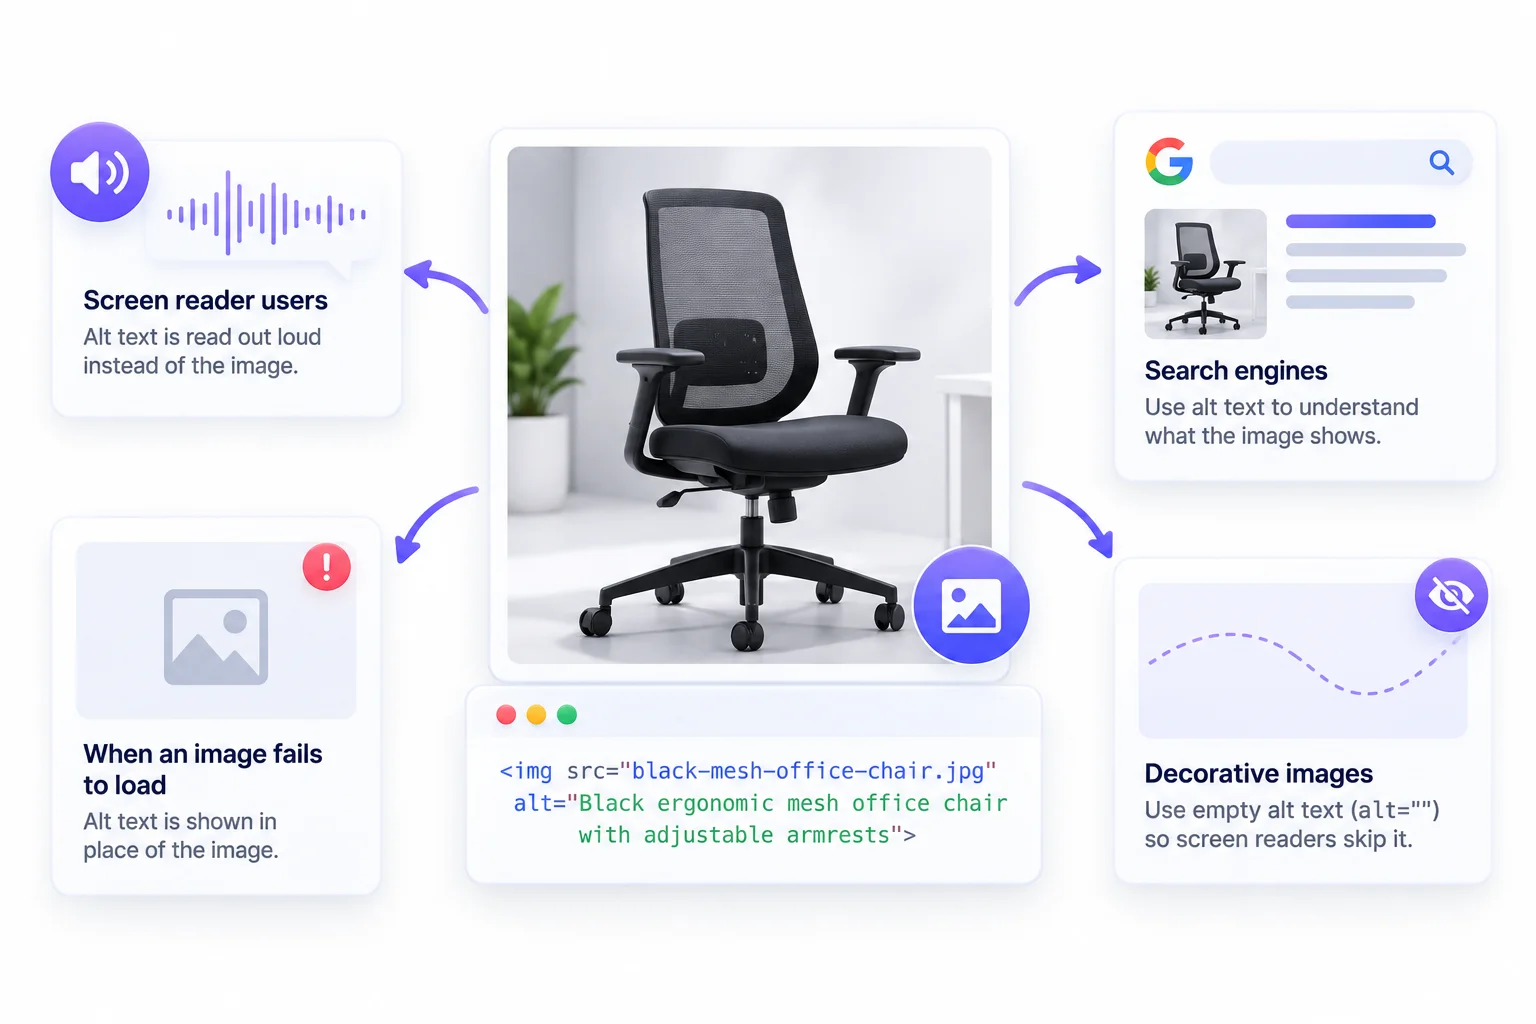
If there’s one section in this guide worth reading twice, it’s this one. Alt text is one of the oldest parts of image SEO, and it’s still one of the most commonly messed up. Either it’s missing entirely, or it’s stuffed with keywords like it’s 2009.
Google calls alt text the most important attribute for providing metadata about an image. And it’s the main way people using screen readers learn what an image shows.
What Alt Text Is and Who Reads It
Alt text (short for alternative text) is a short written description added to an image in the HTML:
<img src="black-mesh-office-chair.jpg"
     alt="Black ergonomic mesh office chair with adjustable armrests">
Three different audiences read it:
- Screen reader users hear it read out loud instead of seeing the image.
- Search engines use it to understand what the image shows.
- Everyone, when an image fails to load sees the alt text in its place.
Keep the screen reader user in mind first. If your alt text helps them, it’ll help Google too. If it reads like a list of keywords, it fails both.
How to Write Good Alt Text: A Simple Formula
A formula that works for most images:
Subject + key detail or action + context (only if it matters)
- Subject: “Golden retriever puppy”
- Key detail: “chewing a blue rope toy”
- Context: “on a wooden kitchen floor”
Result: “Golden retriever puppy chewing a blue rope toy on a wooden kitchen floor.”
A few other rules of thumb:
- Skip “image of” or “picture of.” Screen readers already announce it as an image.
- Be specific. “Chair” is weak. “Black ergonomic mesh office chair” is useful.
- Keep it reasonably short. Around 125 characters is a common practical guideline, mainly so it reads well aloud. It’s not a hard limit from Google, just a sensible target.
- Describe what matters on this page. The same photo might need different alt text on different pages. A photo of a chef in a kitchen, on a recipe page, might focus on the dish. On a staff page, it might focus on the chef.
Where Keywords Belong in Alt Text (and Where They Don’t)
Look, keywords in alt text aren’t bad. They’re bad when they don’t describe the image.
If your page targets “ergonomic office chair” and the image actually shows an ergonomic office chair, putting those words in the alt text is natural and correct. If your page targets “best SEO agency” and the image is a photo of a laptop, writing alt=”best SEO agency” is nonsense. It doesn’t describe the image, and Google’s own guidance warns against filling alt attributes with keywords.
The test: read the alt text out loud with your eyes closed. Does it tell you what the picture shows? If yes, you’re good.
Alt Text for Different Image Types
Different images need slightly different approaches. Product photos need specifics like colour, material and model. Screenshots need to say which screen and what’s being shown. Charts need the takeaway, not every data point.
| Image type | Weak alt text | Strong alt text |
|---|---|---|
| Product photo | “chair” | “Black ergonomic mesh office chair with adjustable armrests” |
| Blog illustration | “SEO image” | “Diagram showing how Google crawls, indexes and ranks a web page” |
| Screenshot | “screenshot” | “Google Search Console performance report filtered to Image search type” |
| Team photo | “our team” | “Five team members reviewing a campaign dashboard in a meeting room” |
| Chart | “graph” | “Bar chart comparing file sizes of JPEG, WebP and AVIF versions of one photo” |
| Decorative divider | “line” | alt="" (empty, so screen readers skip it) |
Decorative Images and Empty Alt Attributes
Not every image needs a description. Decorative stuff like background patterns, divider lines, or a purely visual flourish adds nothing to the content. Describing those just makes screen reader users sit through noise.
For decorative images, use an empty alt attribute:
<img src="wave-divider.svg" alt="">
Note the difference: alt="" (empty) tells screen readers to skip the image on purpose. Leaving the alt attribute out completely is different and worse, because some screen readers then read out the file name instead.
How to decide? Ask: if this image disappeared, would the reader lose any information? If no, it’s decorative.
Alt Text for Charts, Infographics and Images With Text
Complex images are where alt text gets hard. You can’t cram a whole infographic into 125 characters.
So split the job:
- Use the alt text for the main point: “Bar chart showing AVIF files are smallest, followed by WebP, then JPEG.”
- Put the detailed data in the page text, a caption, or an HTML table right next to the image.
Same idea for images with text in them. If a graphic says “Step 1: Resize, Step 2: Compress, Step 3: Rename,” the alt text should include that text, or the steps should appear in the HTML nearby.
Should You Use AI to Write Alt Text?
AI tools can now generate alt text automatically, and some WordPress plugins do it on upload. For a site with thousands of images and zero alt text, that’s a big improvement over nothing.
But review it. AI alt text tends to be generic (“a person sitting at a desk”) and doesn’t know why the image is on this particular page. It also makes mistakes, especially with screenshots, products and anything specific to your business. Use AI to get a first draft, then fix the important ones by hand: product images, featured images and anything on your top pages.
Myth vs Fact
Myth: Alt text is the place to fit as many keywords as possible.
Fact: Alt text should describe the image. A keyword fits naturally only when it genuinely describes what’s shown. Stuffing hurts accessibility and can look spammy.
Captions, Title Attributes and Surrounding Text
Alt text gets all the attention, but it’s not the only text connected to an image. Captions, title attributes and the paragraphs around an image all play a part. People mix these up constantly, so here’s what each one actually does.
Do Image Captions Help SEO?
Captions are the visible text directly under an image. Unlike alt text, everyone sees them.
From a reader’s point of view, captions get read a lot. When people skim an article, their eyes jump between headings, images and the text under images. A good caption can explain what someone’s looking at in one line, which makes the image far more useful.
From Google’s side, captions are part of the page content near the image, and Google’s documentation lists captions among the places it pulls information about an image’s subject. So they help with context.
Should every image have one? Nope. Add captions where they genuinely help: charts, screenshots, before-and-after comparisons, photos that need explaining. A caption on a generic header image that says “Header image” is pointless.
The Title Attribute: What It Does and Doesn’t Do
The title attribute is the little tooltip that pops up when you hover over an image on desktop:
<img src="office-chair.jpg" alt="Black mesh office chair" title="Our best-selling chair">
Here’s the honest truth: it doesn’t do much. It doesn’t appear on mobile because there’s no hover. Screen readers handle it inconsistently. And there’s no good evidence it carries real SEO weight compared to alt text.
Some WordPress plugins auto-fill the title attribute with the file name. That’s harmless, but don’t spend time crafting title attributes. Put that effort into alt text and captions.
Placing Images Next to Relevant Content
This one’s simple and underrated. Put each image right next to the text it relates to.
If you’re explaining how to set up a Search Console property, the screenshot should sit right next to that step, not three sections later. That helps readers follow along, and it gives Google the clearest possible context, because the words describing the image are physically close to it in the HTML.
Avoid dumping all your images into a gallery at the bottom of the page, disconnected from the text that explains them.
| Element | Visible to users? | Read by screen readers? | SEO role |
|---|---|---|---|
| Alt text | Only if image fails to load | Yes | Strong |
| Title attribute | On hover (desktop only) | Inconsistently | Minimal |
| Caption | Yes | Yes | Supports context |
Responsive Images: Serving the Right Size to Every Device
Remember the 2x rule from earlier? Here’s the problem with it. A phone might need a 750-pixel image. A laptop might need 1600. A big desktop monitor might need 2400. If you upload one 2400-pixel image, the phone downloads way more than it needs. If you upload one 750-pixel image, the desktop gets a blurry mess.
Responsive images fix this by giving the browser a list of sizes and letting it pick the right one for each screen.
Why One Image Size Doesn’t Fit All Screens
A phone on a mobile connection and a desktop on fibre are completely different situations. Sending the same file to both means someone always loses. Either the phone wastes data and time on pixels it can’t even display, or the desktop shows a soft, stretched image.
The browser actually knows the screen width, the pixel density, and how wide the image will be shown. It’s in the best position to choose. You just need to give it options.
How srcset and sizes Work
Here’s a basic responsive image. Don’t panic at the code, it’s simpler than it looks:
<img
  src="monstera-repotting-800.jpg"
  srcset="monstera-repotting-400.jpg 400w,
          monstera-repotting-800.jpg 800w,
          monstera-repotting-1600.jpg 1600w"
  sizes="(max-width: 600px) 100vw, 800px"
  alt="Hands lifting a monstera plant out of a plastic nursery pot"
  width="1600" height="900">
Line by line:
- src is the default image, used by any browser that doesn’t understand srcset.
- srcset lists the available versions. The
400w,800w,1600wtell the browser how wide each file actually is. - sizes tells the browser how wide the image will appear on the page. This example says: on screens up to 600 pixels wide, the image fills the full screen width (100vw). On anything bigger, it’s shown at 800 pixels.
- The browser combines that with the screen’s pixel density and downloads the smallest file that still looks sharp.
So a phone with a 375-pixel-wide screen at 2x density needs roughly 750 pixels, and grabs the 800 version. A regular laptop showing the image at 800 pixels might grab the 800 version, and a high-density laptop grabs the 1600.
The picture Element for Formats and Art Direction
You already saw <picture> in the formats section, for serving AVIF and WebP with a JPEG fallback. It does one more job: art direction.
Art direction means showing a differently cropped image on different screens. A wide landscape banner might look great on desktop but turn into a tiny strip on a phone. With <picture>, you can serve a tighter, taller crop to phones:
<picture>
  <source media="(max-width: 600px)" srcset="team-meeting-mobile.webp">
  <img src="team-meeting-wide.webp"
       alt="Five team members reviewing a campaign dashboard"
       width="1600" height="700">
</picture>
Rule of thumb: use srcset when you want the same image at different sizes. Use <picture> when you want different formats or different crops.
Does Your CMS Already Do This?
Good chance it does, at least partly.
- WordPress has generated
srcsetandsizesautomatically for images inserted into content since version 4.4. It creates several sizes on upload and adds them to the markup. - Shopify themes typically output responsive image markup through Shopify’s image filters, and the CDN generates sizes on the fly.
- Next.js has the
next/imagecomponent, which generates multiple sizes and the srcset for you.
What these systems can’t always guess correctly is the sizes value. If a theme says an image is 1200 pixels wide when it’s actually shown at 400, the browser downloads too much. Use the Inspect trick from the dimensions section to spot this.
Beginner Note: Google parses
<img>tags even when they sit inside a<picture>element, so using<picture>for modern formats is safe for indexing.
Lazy Loading Images the Right Way
Lazy loading means the browser only loads an image when the user scrolls near it, instead of downloading every image the moment the page opens. On a long article with 20 images, most visitors never scroll to the bottom. So why make them download images they’ll never see?
It’s a great technique. It’s also one of the easiest ways to accidentally make a page slower, if it’s applied to the wrong images.
What Lazy Loading Does
Without lazy loading, a browser opening a page with 20 images starts fetching all 20 straight away. That competes for bandwidth with everything else the page needs: CSS, fonts, scripts, and the images actually visible on screen.
With lazy loading, only the images in or near the visible area load at first. The rest wait until the user scrolls toward them. Less data up front, faster initial load, and mobile users save data on images they never reach.
Native Lazy Loading With loading=”lazy”
You don’t need a plugin or a JavaScript library anymore. Browsers support lazy loading natively with one attribute:
<img src="repotting-step-4.webp"
     alt="Loosening tangled monstera roots by hand"
     width="800" height="600"
     loading="lazy">
That’s it. All major browsers support it. WordPress has added loading="lazy" to images automatically since version 5.5, and in later versions it tries to skip the first images on the page.
Never Lazy Load Your Hero Image
Here’s where people get burned. If you lazy load the big image at the top of the page, the browser deliberately waits before fetching it. And that image is usually your Largest Contentful Paint element. So you’ve just told the browser to delay the exact thing Google measures.
For the main image above the fold, do the opposite. Load it eagerly and tell the browser it’s important:
<img src="monstera-hero.webp"
     alt="Healthy monstera plant in a terracotta pot by a sunny window"
     width="1600" height="900"
     fetchpriority="high">
fetchpriority="high" tells the browser to fetch this image before less important stuff. Don’t add loading="lazy" to it. And don’t sprinkle fetchpriority="high" on every image, because if everything is high priority, nothing is.
Simple rule: the first one or two images someone sees without scrolling load normally (with high priority on the main one). Everything below the fold gets loading="lazy".
JavaScript Lazy Loading and Crawlability Risks
Before native lazy loading existed, sites used JavaScript libraries. Many of them work by putting the real image URL in an attribute like data-src and swapping it in on scroll.
The risk: if that swap only happens on a scroll event, and the crawler doesn’t scroll, the image might never load for the crawler. Google’s guidance on lazy loading recommends making sure content loads when it’s visible in the viewport, using methods like the IntersectionObserver API or native lazy loading, rather than depending on user actions like scrolling or clicking.
If your site still uses an old JavaScript lazy loading library, switching to native loading="lazy" is usually the simplest and safest fix. To check what Google actually sees, run the URL Inspection tool in Search Console and look at the rendered HTML for your image URLs.
Common Mistake: Many WordPress themes and plugins lazy load every image, including the one at the top of the page. That delays your Largest Contentful Paint. Exclude above-the-fold images from lazy loading.
How Images Affect Core Web Vitals
Core Web Vitals are three metrics Google uses to measure real user experience on a page. Images touch all three, but two of them in a big way. Everything covered so far (format, size, compression, lazy loading) feeds into these numbers.
Quick refresher on what “good” looks like, according to Google’s thresholds:
- Largest Contentful Paint (LCP): 2.5 seconds or less
- Cumulative Layout Shift (CLS): 0.1 or less
- Interaction to Next Paint (INP): 200 milliseconds or less
Largest Contentful Paint (LCP) and Your Hero Image
LCP measures how long it takes for the biggest visible element in the viewport to show up. On most pages, that’s an image: the hero banner, the featured image, the main product photo.
So if your LCP is slow, the hero image is the first suspect. The usual fixes, in order of impact:
- Resize it to the size it’s actually displayed at (with 2x for sharpness).
- Compress it and use WebP or AVIF.
- Don’t lazy load it. Add
fetchpriority="high"instead. - Serve it from a fast host or CDN.
- Make sure it’s in the HTML, not injected later by JavaScript or set as a CSS background, so the browser finds it early.
Cumulative Layout Shift (CLS): Always Set Width and Height
You know when you’re about to tap a link and the page suddenly jumps because an image loaded above it, and you tap the wrong thing? That’s layout shift. CLS measures how much of it happens.
Images without dimensions cause this constantly. The browser doesn’t know how much space to reserve, so it reserves nothing, then pushes everything down when the image arrives.
The fix is almost embarrassingly easy. Add width and height:
<img src="office-chair.webp" alt="Black mesh office chair"
     width="1200" height="800">
Modern browsers use those two numbers to work out the aspect ratio and reserve the right space, even if your CSS makes the image responsive. If you can’t set the attributes for some reason, the CSS aspect-ratio property does the same job.
Preloading Critical Images
Sometimes the browser discovers the hero image late. Maybe it’s defined in CSS, or loaded by a slider script. In those cases you can tell the browser about it early with a preload hint in the <head>:
<link rel="preload" as="image"
      href="monstera-hero.webp"
      fetchpriority="high">
For responsive images, preload supports imagesrcset and imagesizes so the browser preloads the correct size.
Be careful with preloading. Preload only the one image that actually is your LCP element. Preloading lots of images just recreates the original bandwidth fight.
Using a CDN and Image CDN
A CDN (content delivery network) stores copies of your files on servers around the world, so a visitor in Sydney doesn’t have to wait for an image to travel from a server in Frankfurt.
An image CDN goes further. Services like Cloudinary, Cloudflare Images and ImageKit can resize, compress and convert images to WebP or AVIF automatically based on the device requesting them. You upload one high-quality original, and the CDN handles the rest through URL parameters.
For sites with lots of images, or teams who just won’t resize before uploading (it happens), an image CDN takes a whole category of mistakes off the table.
| Metric | Common image problem | Fix |
|---|---|---|
| LCP | Oversized or lazy-loaded hero image | Resize, compress, modern format, fetchpriority="high", preload |
| LCP | Slow server or no caching | CDN, caching headers |
| CLS | Missing width/height attributes | Add width and height or CSS aspect-ratio |
| CLS | Late-loading ads or banners with images | Reserve space in the layout |
| INP | Heavy image sliders and carousels | Simplify, limit scripts |
Making Sure Google Can Crawl and Index Your Images
All the alt text in the world is wasted if Google can’t actually find your images. This section is the plumbing. It’s not exciting, but if one pipe is blocked, nothing downstream works.
Use HTML img Elements, Not CSS Background Images
Google’s documentation is clear on this: it finds images through HTML image elements, and it doesn’t index CSS background images.
So this image can be indexed:
<img src="golden-retriever-puppy.jpg" alt="Golden retriever puppy on a lawn">
And this one can’t:
<div style="background-image: url(golden-retriever-puppy.jpg)">
  A golden retriever puppy
</div>
Page builders love background images for hero sections, because they’re easy to put text on top of. That’s fine for purely decorative backgrounds. But if an image actually matters (a product, a key visual, something you want ranking in Google Images), it needs to be an <img> element.
Check robots.txt Isn’t Blocking Your Images
robots.txt is a file that tells crawlers which parts of your site they’re allowed to access. Sometimes, usually by accident, it blocks image folders.
Look for lines like these in yourdomain.com/robots.txt:
User-agent: *
Disallow: /wp-content/uploads/
Or rules targeting Google’s image crawler:
User-agent: Googlebot-Image
Disallow: /
If you see something like that and you do want your images in search, it needs fixing. Also check the robots.txt of any CDN or subdomain hosting your images, since each host has its own robots.txt.
Image Sitemaps: What They Are and When You Need One
An image sitemap tells Google about images it might not find otherwise, like images loaded by JavaScript. You can make a separate image sitemap or add image tags to your existing sitemap.
<?xml version="1.0" encoding="UTF-8"?>
<urlset xmlns="http://www.sitemaps.org/schemas/sitemap/0.9"
        xmlns:image="http://www.google.com/schemas/sitemap-image/1.1">
  <url>
    <loc>https://example.com/how-to-repot-a-monstera/</loc>
    <image:image>
      <image:loc>https://example.com/images/monstera-repotting.webp</image:loc>
    </image:image>
    <image:image>
      <image:loc>https://cdn.example.com/monstera-roots.webp</image:loc>
    </image:image>
  </url>
</urlset>
A few things worth knowing:
- Each
<url>is a page, and the<image:loc>entries are the images on that page. - Google allows image URLs from other domains in image sitemaps, which is useful if your images live on a CDN.
- Google deprecated the old image sitemap tags like
image:captionandimage:titleback in 2022. Onlyimage:locmatters now. Some older tutorials still show the removed tags.
Do you need one? For a simple blog where every image is a normal <img> in the HTML, Google usually finds them anyway. Most SEO plugins (Yoast, Rank Math, AIOSEO) include images in your sitemap automatically. An image sitemap becomes more important for big ecommerce sites, sites with JavaScript-loaded images, or image-heavy sites like photography portfolios.
Hosting Images on a CDN or Subdomain
Hosting images on a CDN or a separate subdomain (like images.example.com) is completely fine for SEO. Lots of big sites do it. Just make sure:
- The CDN isn’t blocking Google through robots.txt or firewall rules
- The image URLs are referenced in your page HTML or sitemap
- The CDN returns proper responses (not errors or login walls) when Googlebot requests images
Keep Image URLs Stable
Every time an image URL changes, Google has to rediscover it. Some setups create new URLs constantly, like adding random query strings for cache busting on every deploy, or regenerating file names.
Stable URLs let Google build up a history for each image. If you have to change URLs, like during a site migration, redirect old image URLs to new ones just like you would for pages. Image redirects get forgotten in migrations all the time, and image traffic quietly drops as a result.
Controlling Which Images Appear in Search
Sometimes you don’t want images in Google Images. Maybe they’re private, licensed for limited use, or just irrelevant. Options:
- Block a specific image path in robots.txt for Googlebot-Image.
- Use the noimageindex robots directive to stop images on a page from being indexed:
<meta name="robots" content="noimageindex">
- For sites worried about hotlinking (other sites displaying your images on their pages using your bandwidth), Google’s documentation describes ways to handle this by checking the HTTP referrer, but warns to avoid blocking Google’s own requests.
Pro Tip: If your images live on a CDN domain, make sure that domain is verified or at least crawlable, and include those URLs in your image sitemap. Google allows image URLs from other domains in image sitemaps.
Structured Data and Image Metadata
Structured data is code you add to a page to tell search engines exactly what things are. Instead of Google guessing that an image is the main photo of a product, you tell it directly. This is one of the biggest gaps in most image SEO guides, so it’s worth taking slowly.
How Structured Data Helps Images
Structured data connects your images to meaning. A product image marked up with Product schema isn’t just “a picture of a chair.” It’s “the image for this chair, which costs this much, is in stock, and has these reviews.”
That can make your page eligible for rich results, product listings with images, recipe cards with photos, and a better chance of the right image showing next to your result. Google Images itself supports structured data for products, videos and recipes, which can add badges to image results.
Product, Recipe, Article and ImageObject Markup
Most structured data is written in JSON-LD, a block of code placed in the page’s HTML. Here’s a simplified Article example with an image:
<script type="application/ld+json">
{
  "@context": "https://schema.org",
  "@type": "Article",
  "headline": "How to Repot a Monstera Without Killing It",
  "image": [
    "https://example.com/images/monstera-repotting-16x9.webp",
    "https://example.com/images/monstera-repotting-4x3.webp",
    "https://example.com/images/monstera-repotting-1x1.webp"
  ],
  "datePublished": "2026-10-14"
}
</script>
Notice the three image URLs. Google’s Article documentation recommends providing multiple high-resolution images in different aspect ratios (16:9, 4:3 and 1:1), so it can pick the best fit for different displays.
Product schema works the same way, but adds name, price, availability and reviews. Recipe schema adds ingredients and cook time. In most cases, an SEO plugin or ecommerce platform generates the basics for you. Your job is checking that the right images are in there, using Google’s Rich Results Test.
Specifying a Preferred Image for Your Page (Google’s 2026 Update)
This is fresh. In March 2026, Google updated its image SEO documentation with a new section on specifying a preferred image using metadata. Basically, it’s how you tell Google which image sums up a page best, which can affect the thumbnail shown next to your result.
You can signal your preferred image through:
- The
imageproperty in schema.org markup (like the Article example above) - The
og:imagemeta tag
<meta property="og:image" content="https://example.com/images/monstera-repotting-16x9.webp">
Google’s guidance for choosing that preferred image:
- Pick something relevant and representative of the page. Not a random decorative image.
- Avoid generic images like your site logo. A logo tells nobody what this particular page is about.
- Avoid images with text. They turn into unreadable thumbnails.
- Use a high-resolution image where possible.
- Consider a 16:9 ratio, which is among the aspect ratios Google suggests.
Here’s what’s interesting about this. Loads of sites set their logo as the default og:image across every page, because their SEO plugin asked for a “default social image” during setup and someone uploaded the logo. Google is now explicitly saying not to do that. Worth checking your settings.
Image Licence Metadata and the “Licensable” Badge
If you license your images, Google Images can show a “Licensable” badge on them, with a link to how someone can license the image. That’s useful for photographers, stock sites and publishers.
You can add licence information in two ways:
- Structured data, using properties like
licenseandacquireLicensePageon an ImageObject - IPTC photo metadata embedded in the image file itself, with fields like Web Statement of Rights and Licensor URL
<script type="application/ld+json">
{
  "@context": "https://schema.org",
  "@type": "ImageObject",
  "contentUrl": "https://example.com/photos/coastal-lighthouse-sunrise.jpg",
  "license": "https://example.com/image-licence",
  "acquireLicensePage": "https://example.com/buy-this-photo",
  "creator": { "@type": "Person", "name": "Photographer Name" },
  "copyrightNotice": "Photographer Name"
}
</script>
This is the reason to keep IPTC metadata when compressing, if licensing matters to your business.
Open Graph and Social Images
Open Graph tags control how your page looks when shared on Facebook, LinkedIn, WhatsApp and most other platforms. The key image tag is og:image, and it now doubles as one of the ways to signal your preferred image to Google.
A solid Open Graph image setup:
- Unique og:image per page, ideally the featured image
- 1200 × 630 pixels works well across platforms
- Minimal or no text in the image
- Not your logo (unless the page is literally about your brand)
| Content type | Schema to use | Image benefit |
|---|---|---|
| Blog post | Article (image property) | Preferred thumbnail, Discover eligibility |
| Product page | Product | Shopping results, product badges, Lens matches |
| Recipe | Recipe | Rich results with images |
| Licensed photography | ImageObject (license, acquireLicensePage) | Licensable badge in Google Images |
| Any page | og:image meta tag | Social previews, preferred image signal |
Optimising for Google Lens, Visual Search and AI Overviews
This is where image SEO is heading, and also where a lot of overexcited advice lives. Some articles claim “traditional image SEO is dead” because AI can see images now. That’s wrong. Lens and AI systems still use the page, the alt text, the captions and the structured data. They just also look harder at the picture itself.
So the fundamentals stay. What changes is that image quality and clarity matter more than before.
How Visual Search Works
With Lens, someone uses an image as the search query. They point their camera at a plant, a pair of trainers, a building, a menu in another language, and Google tries to identify it and find related results.
To do that, Google’s models identify objects and entities in the image, compare it against images they’ve already seen and indexed, read any text inside it, and then connect all of that with the pages those matching images sit on.
So for your image to show up as a Lens result, two things need to be true. The image has to be clear enough to match, and the page it’s on has to make clear what the thing is.
Make Your Subject Clear
For visual matching, clarity wins:
- One main subject per image. Busy scenes are harder to match.
- Plain or simple backgrounds for product shots, so the product’s outline is obvious.
- Multiple angles for products. Front, side, back, detail shots. Someone pointing their phone at a bag won’t always see it from the front.
- Good lighting and accurate colours. If the photo makes a navy jacket look black, it won’t match properly when someone scans the real thing.
- Real photos of real things. If you sell a product, original photos of that exact product beat generic or manufacturer-supplied images that hundreds of other sellers also use.
Make Text in Images Readable
OCR reads text in images, but only if it can. Text on charts, diagrams, labels and screenshots should have:
- Strong contrast against the background
- A size that’s still legible when the image is shrunk
- Clean, simple fonts
And don’t compress images with text so hard that the letters turn to mush. Compression artefacts around small text are exactly what makes OCR fail.
Build Strong Context Around Every Image
This is the part people who say “alt text is dead” are missing. AI systems combine what they see in the image with what the page says about it. That means all the signals from earlier work together:
- Alt text that names the thing specifically (“Fiddle leaf fig with brown leaf edges” is better than “plant”)
- A caption explaining what the image shows
- The surrounding paragraph that discusses it
- Structured data, especially for products
When the image clearly shows a fiddle leaf fig with brown edges, and the alt text, caption and page all talk about fiddle leaf figs with brown edges, there’s no confusion left for any system.
Images That Support AI Answers
AI Overviews and similar features pull in visuals that help explain an answer. Look at what kind of images tend to be useful in that context: diagrams that explain a process, comparison charts, step-by-step visuals, clear photos of the thing being discussed.
Stock photos of people smiling don’t explain anything. An original diagram showing “how water moves through a plant” does. If you want your images to be useful to AI systems, make them genuinely explain something.
Idea: Create one original, clearly labelled diagram for each core concept on your page. Original explanatory visuals are hard to copy, easy for AI systems to interpret, and naturally attract links.
Image SEO on WordPress, Shopify and Next.js
Everything so far applies no matter what your site is built on. But the actual buttons you click depend on your platform. Most guides only cover WordPress. Here’s the practical side for the three setups that cover a huge chunk of the web.
WordPress
WordPress handles a lot automatically, but there are a few things to check:
- Alt text field. In the Media Library, click an image and fill in the “Alternative Text” field. Alt text set there becomes the default when you insert the image, though in the block editor you can also edit it per image in the block settings.
- Attachment pages. WordPress can create a separate page for each uploaded image. These are thin pages with nothing but an image, and they can get indexed. WordPress 6.4 disabled attachment pages by default for new sites, and most SEO plugins (Yoast, Rank Math) can redirect them to the image file or parent post on older sites.
- Compression and WebP. WordPress compresses JPEGs a little on upload, but a plugin like ShortPixel, Imagify or EWWW does far more, including WebP and AVIF conversion.
- Lazy loading. Native lazy loading has been built in since WordPress 5.5. Check that your theme or optimisation plugin isn’t lazy loading your hero image.
- Page builders like Elementor. Watch out for hero sections built with background images. They look great, but as covered earlier, CSS backgrounds aren’t indexed. For important visuals, use an Image widget instead. Also check the image size setting on each widget so it isn’t loading the full original.
Shopify
Shopify does more of the technical work for you, which is nice:
- Alt text. Open a product, click the image in the Media section, and choose to add alt text. Do this for every product image, not just the first one.
- WebP. Shopify’s CDN automatically serves WebP to browsers that support it. You don’t need to convert anything yourself.
- File names. Shopify keeps your original file name in the image URL, so rename files before uploading. Renaming after upload usually means re-uploading.
- Image sizes. Theme settings control how big images display. Upload high-quality originals (Shopify generates smaller versions), but keep them reasonable so admin uploads stay manageable.
- Product schema. Most modern Shopify themes include Product structured data. Run a product page through the Rich Results Test to confirm the image is included.
Next.js and Headless Sites
Next.js and other headless setups give you full control, which also means full responsibility:
- Use the next/image component instead of a plain
<img>. It handles resizing, modern formats, lazy loading and srcset automatically. - Mark your hero image as a priority. By default, next/image lazy loads images. For the LCP image, use the component’s priority setting so it loads eagerly. The exact prop has changed across Next.js versions, so check the docs for the version you’re on.
- Set the sizes prop. Without it, next/image may generate a srcset that doesn’t match your layout, and browsers download larger files than needed.
- Configure remote images. If images come from a headless CMS or external CDN, you need to allow those domains in your Next.js config.
- Don’t forget the sitemap. Next.js doesn’t generate an image sitemap for you. You’ll need to build it yourself or use a package.
- Check server rendering. Make sure images appear in the server-rendered HTML, not only after client-side JavaScript runs.
| Task | WordPress | Shopify | Next.js |
|---|---|---|---|
| Add alt text | Media Library field | Product media “Edit alt text” | alt prop on Image component |
| Modern formats | Plugin (e.g. ShortPixel, Imagify) or CDN | Automatic | Automatic via next/image |
| Responsive images | Automatic srcset | Automatic | sizes prop |
| Lazy loading | Native since WP 5.5 (check theme) | Theme-dependent | Default; use priority setting for hero |
| Image sitemap | SEO plugin | Built-in sitemap | Generate manually or via package |
Tools That Help You Optimise Images for SEO Faster
You don’t need dozens of tools. You need one or two for each job: compressing, auditing and monitoring. Here’s a short list that covers basically everything, most of it free.
For compression, Squoosh is the best place to learn. It’s free, runs in the browser, and the side-by-side slider teaches you what different quality settings actually look like. TinyPNG is faster for quick drag-and-drop jobs. Mac users have ImageOptim for lossless batch work.
For WordPress, ShortPixel, Imagify and EWWW all do bulk compression and WebP or AVIF conversion. They work on a similar model, with free usage limits and paid plans after that. Pick one. Running two at once causes conflicts.
For automatic optimisation at scale, image CDNs like Cloudinary, Cloudflare Images and ImageKit resize and convert on the fly.
For auditing, PageSpeed Insights and Lighthouse (built into Chrome DevTools) diagnose image problems on a single page and tell you which image is your LCP element. Screaming Frog crawls your whole site and lists missing alt text and oversized images. The free version crawls up to 500 URLs, which covers most small sites.
For monitoring, Google Search Console shows how your images actually perform in search.
| Category | Tool | Best for | Free option |
|---|---|---|---|
| Compression | Squoosh | Manual, side-by-side quality testing | Yes |
| Compression | TinyPNG / TinyJPG | Quick drag-and-drop compression | Yes (limits) |
| Mac compression | ImageOptim | Lossless batch optimisation | Yes |
| WordPress | ShortPixel, Imagify, EWWW | Bulk compression + WebP/AVIF | Yes (limits) |
| Image CDN | Cloudinary, Cloudflare Images, ImageKit | Automatic resizing and formats | Free tiers |
| Auditing | PageSpeed Insights, Lighthouse | Speed and LCP diagnosis | Yes |
| Auditing | Screaming Frog | Missing alt text, oversized images at scale | Yes (500 URLs) |
| Monitoring | Google Search Console | Image search performance | Yes |
Free limits and pricing change often, so check each tool’s current plans before committing.
How to Audit Your Website’s Images
So you’ve learned the theory. Now what about the hundreds of images already on your site? An audit tells you what’s broken and what to fix first. You can do a solid one in an afternoon.
Step 1: Crawl Your Site for Image Issues
Run your site through Screaming Frog (free up to 500 URLs). Once the crawl finishes, open the Images tab. It has built-in filters for:
- Missing alt text
- Missing alt attribute entirely
- Over 100 KB (the default size threshold, which you can adjust)
- Missing size attributes (width and height)
Export each list. You’ll probably find the same patterns repeating, like one template that never outputs alt text, or one upload habit that keeps producing huge files.
Also check the response codes section for broken images (404s). Broken images are quick wins.
Step 2: Check Page Speed on Key Templates
Don’t test every page. Test one example of each template: homepage, a blog post, a category page, a product page. Fixing a template fixes every page that uses it.
Run each through PageSpeed Insights. Look at:
- Which element is the LCP, and whether it’s an image
- Image delivery suggestions, like images that are oversized, not in modern formats, or not compressed enough
- Layout shift warnings caused by images without dimensions
- Whether the LCP image is lazy loaded, which PageSpeed Insights flags
Step 3: Review Index Coverage and Sitemaps
Check that Google can actually reach your images:
- Look at your robots.txt for any rules blocking image folders or Googlebot-Image
- Confirm your sitemap includes images (or that your images are plain
<img>elements Google can find anyway) - Use the URL Inspection tool in Search Console on a key page and check the rendered HTML to see whether images appear
Step 4: Prioritise Fixes by Impact
You’ll end up with a long list. Don’t try to fix everything at once. Prioritise like this:
- Hero and LCP images on high-traffic templates. Biggest speed impact, smallest effort.
- Broken images. Quick to fix, look terrible to users.
- Missing alt text on your top 20 pages and all product pages.
- Oversized images across the site, handled in bulk with a plugin or CDN.
- Everything else, handled gradually as you update content.
| Check | Tool | What “good” looks like |
|---|---|---|
| Missing alt text | Screaming Frog | Every meaningful image has descriptive alt |
| Oversized files | Screaming Frog / PSI | No unnecessarily heavy images on key pages |
| Wrong format | PageSpeed Insights | No modern format warnings in image delivery |
| Missing dimensions | Lighthouse | No CLS warnings from images |
| Lazy-loaded LCP image | PageSpeed Insights | Hero image loads eagerly |
| Broken images | Screaming Frog | Zero 404 image URLs |
| Blocked images | robots.txt check / URL Inspection | Images crawlable |
How to Measure Image SEO Results
Doing the work is one thing. Proving it worked is another, and it matters, especially if you need to justify the time to a boss or a client. The good news is that the main tool is free.
Google Search Console: Filtering by Image Search Type
In Search Console, open the Performance report. At the top there’s a filter called “Search type,” which defaults to “Web.” Change it to “Image.”
Now you’re looking only at traffic from Google Images. You can see:
- Clicks and impressions from image search
- Which queries your images show up for
- Which pages get image traffic
That last one’s handy. If a page gets lots of image impressions but few clicks, the image is showing up but nobody wants to click. That usually means a weak image or a page that doesn’t match the query.
Also keep the “Web” view in mind. Images in regular search results are counted under Web, not Image, so image improvements can show up in both places.
Discover Performance Report
If your site gets traffic from Google Discover, there’s a separate Discover report in Search Console. Since Discover leans so heavily on big, high-quality images, this report is where you’ll see whether better featured images and max-image-preview:large made a difference.
Discover traffic swings a lot from day to day, so look at trends over weeks, not individual days.
Tracking Speed Improvements Over Time
The Core Web Vitals report in Search Console shows how your URLs perform based on real user data from Chrome users, grouped into “Good,” “Needs improvement” and “Poor.”
After fixing images, it takes time for this to update, because it’s based on 28 days of real user data. Don’t expect overnight changes. PageSpeed Insights gives instant lab results, but the field data is what Google uses.
Pro Tip: Note the date you complete your image fixes, then compare Image search clicks and impressions for the 28 days before and after in Search Console.
Common Image SEO Mistakes to Avoid
Most image SEO problems aren’t complicated. They’re the same handful of mistakes, repeated across thousands of sites. Here they are in one place, so you can spot them on yours.
The biggest one by far is uploading photos straight from a phone or camera. They’re often several thousand pixels wide and several megabytes in size. Right behind that is lazy loading the hero image, which tanks LCP while looking like an optimisation. And then there’s alt text, which is either missing or turned into a keyword dump.
| Mistake | Why it hurts | Fix |
|---|---|---|
| Uploading full-resolution camera photos | Slow pages, poor LCP | Resize to display size before upload |
| Keyword-stuffed alt text | Poor accessibility, spam signal | Describe the image naturally |
| Lazy loading the hero image | Delayed LCP | Load eagerly with fetchpriority=”high” |
| Using CSS backgrounds for key images | Not indexed | Use <img> |
| No width/height attributes | Layout shift (CLS) | Always set dimensions |
| Stock images everywhere | No originality, weak Lens signals | Use original photos and graphics |
| Important text only inside images | Inaccessible, harder to index | Put key text in HTML too |
| Generic logo as og:image | Poor previews, weak preferred image | Use a relevant 16:9 image |
Fixing even three of these on your main templates usually makes a visible difference to speed scores within the first test.
The Complete Checklist to Optimise Images for SEO
Here’s everything from this guide boiled down into one workflow. Save it, print it, stick it next to whoever uploads images on your site. It’s split into three stages because that’s how the work actually happens: before the image goes up, while it goes up, and after the page is live.
Run through this every time you optimise images for SEO on a new page, and do a full pass on your highest-traffic pages first.
| Stage | Task | Done |
|---|---|---|
| Before upload | Choose an original, relevant image | ☐ |
| Resize to the right display dimensions (2x for retina) | ☐ | |
| Convert to WebP (or AVIF with fallback) | ☐ | |
| Compress from the original file | ☐ | |
| Rename with a descriptive, hyphenated file name | ☐ | |
| On upload | Write descriptive alt text (or alt=”” if decorative) | ☐ |
| Add a caption where it helps the reader | ☐ | |
| Place the image near relevant text | ☐ | |
| Set width and height | ☐ | |
| Lazy load below-the-fold images only | ☐ | |
| After publishing | Add or validate structured data and og:image | ☐ |
| Confirm the image is in your sitemap | ☐ | |
| Test the page in PageSpeed Insights | ☐ | |
| Monitor Image search in Search Console | ☐ |
Once this becomes a habit, it adds maybe two minutes per image. That’s nothing compared to the time it takes to fix a whole site later.
Conclusion
Images are content. That’s the whole idea behind this guide. They deserve the same attention as the words around them, because they do just as much work: they bring in traffic from places text can’t reach, they decide how fast a page feels, and they make content easier to understand for everyone, including people using screen readers.
The process isn’t complicated once it clicks. Choose images that actually show something useful. Get the format, size and compression right before you upload. Describe each image honestly with a sensible file name, real alt text and a caption when it helps. Deliver it smartly with responsive markup, the right loading priority and proper dimensions. Then make sure Google can crawl it, and check Search Console to see what changed.
Don’t try to fix your entire site this week. Take the five pages that get the most traffic, run them through the checklist, and fix what you find. Then make the checklist part of every upload from here on. That’s honestly how most sites learn to optimise images for SEO properly: not with one big overhaul, but with a better habit. And if you’d rather have someone run a full image SEO audit on your site, reach out to our team and we’ll take a look.
Frequently Asked Questions
Does image SEO still matter in 2026?
Yes, probably more than before. Images now appear in Google Images, regular results, Discover, Lens and AI Overviews. On top of that, images are often the Largest Contentful Paint element, so they directly affect Core Web Vitals. AI can read pixels now, but it still relies on alt text, captions and page context to understand images.
What is the best image format for SEO?
For most images, WebP. It’s supported by all modern browsers and produces much smaller files than JPEG or PNG at similar quality. AVIF compresses even better but works best with a fallback. Use SVG for logos and icons. Google can index all of these, so the choice is really about speed and quality.
How long should alt text be?
Long enough to describe the image clearly, short enough to read comfortably aloud. Around 125 characters is a common practical guideline, but Google doesn’t set a hard limit. Focus on the subject and the most important detail. For complex charts, put the main point in alt text and the full detail in the page text.
Should every image have alt text?
Every meaningful image should. Decorative images, like divider lines or background patterns, should have an empty alt attribute (alt="") so screen readers skip them. Don’t leave the alt attribute out entirely, because some screen readers will read the file name out loud instead.
What file size should images be for websites?
Google doesn’t publish an official file size target. Aim for the smallest file that still looks good at its displayed size. As a practical audit threshold, Screaming Frog flags images over 100 KB, which is a useful way to find the heaviest offenders. Pay most attention to the hero image, since it affects LCP.
Do image file names affect SEO?
A little. Google says file names can give it clues about an image’s subject. A descriptive name like red-leather-office-chair.jpg helps more than IMG_4821.jpg. It’s a small signal, but it takes seconds, so do it for every new upload. Renaming old images is usually not worth the redirect hassle.
Is lazy loading bad for SEO?
No, native lazy loading with loading="lazy" is fine for SEO. The problem is lazy loading the wrong images. Never lazy load the hero image or anything visible without scrolling, because that delays LCP. And be careful with old JavaScript lazy loading that only triggers on scroll, since crawlers may not see those images.
Do I need an image sitemap?
Not always. If your images are standard <img> elements in your HTML, Google usually finds them. Most SEO plugins add images to your sitemap anyway. Image sitemaps matter more for large ecommerce sites, image-heavy sites, images loaded by JavaScript, or images hosted on a CDN.
Are AI-generated images bad for SEO?
Not automatically. Google judges images on relevance and helpfulness, not on how they were made. Problems start when AI images are inaccurate, misleading, or pretend to be real photos. Google supports IPTC metadata to mark AI-generated images, and Merchant Center requires it for AI-generated product images.
How do I get my images into Google Discover?
Use large, high-quality images at least 1200 pixels wide, and allow large previews with the max-image-preview:large robots setting. Avoid using your logo as the main image. Beyond images, Discover depends on content quality and interest, so a great image alone won’t guarantee placement.